Tuesday, November 15, 2011

a long overdue brag

During the summer, my sweet and talented niece Sarah Traynor visited me and the boys to help with the new baby since Erik was on the other side of the world. And not only did she come and help me take care of my crew, she also brought baby Henry a beautiful handmade quilt that she finished from the reunion. She even quilted it people! The back is the softest chocolate brown minky fabric and Henry just loves the quilt and his cousin Sarah.
Here's Sarah and her three week old recipient, back in June at our house in California.
Thanks, Sarah! We love you!

Monday, November 14, 2011

Glenna and Peg Update

It is time we had a little update on this blog.
I know others have been working on quilts so send the pictures to Glenna or Emily Traynor and we will add them.  
Jamie got me going tonight and I thought it would be a good way to keep in touch with Emily in Germany.  Maybe she will even do some German quilting.
This is what I had.
Jamie came over to show me the quilt she made for a friend that went on a mission to Australia
She made up the pattern and did a fabulous job.
I think Jamie is officially " hooked" on quilting! 

This is the quilt Peg made for Jacie for her baptism you know "comforter"

Great label

Quilt Glenna made for Halle. It is her baptism quilt.

Peg's quilt she made for Jake and Emily's Jasper

I had to add this quilt I have been working on for a year.  It is ready to be quilted now.

Sarah's Graduation quilt.
Made by G-Ma K


The Aunts made quillows for Granny's Graduates
Hayley's

Rebecca and Rachael's

We are getting fancy and put satin on the back.


We are going back to the quilt Peg made for Megan and Chris's Boston
This is a quilt Glenna is working on for this Christmas
Grandma's Gifts  

Tuesday, April 26, 2011

Great Idea for Reunion Quilt

Look at these fabrics. They are the same as our reunion fabrics.
I just saw this on a great  blog I check out.
Just a suggestion but I thought it would be fun.
Great Idea!
http://www.diaryofaquilter.com/2011/04/soul-blossoms-on-my-design-wall.html

Wednesday, April 13, 2011

Mesa Quilting Bee April 2011

Check out Jamie's Reunion Quilt
"Trapezoid" 

Jamie had her 9 patch quilt quilted and is learning how to
"bind a quilt."

Jacque and Annie working on Annie's 9-patch.
She quilted it and finished the  binding.
Good Job Annie!

Callie with her finished quilt.  So cute!

Annie and Callie model the pioneer dresses Jacque made for the Stake Trek coming up.

Callie made this pillow while her mom was working on the pioneer dresses.  She designed the pattern and did all the sewing.
She made it for a friend. 

Lynn and Chandler start a Jelly Roll Quilt.  They laid out the strips and are ready to start sewing.  It's going to be  cute.

Just a little blanket Glenna made for Macey to replace the one she has chewed the corners.  We  used this to teach  how to put on binding.
For instructions on how to Bind a Quilt Go Here

Glenna and Peg show off the Shamrock Quilts.
 We will post the pattern on the blog soon.

Jessica lays out her 9-patch blocks

The next day Abby and Emily we at Grandma's and we did some sewing.

Emily is thinking of making  a quilt  for a YW 10 hour project.

Friday, February 4, 2011

Mesa Quilting Bee February 2011


Aunt Sally was the first to finish her reunion Quilt! It look fabulous, it is quilted and  ready to bind.
She made it with 9- 9 patches with white in the center and 5 inch sashing and borders.


Aunt Sydney brought the quilt Donna sent her as a Thank You for housing   her family for the reunion.  Sydney was thrilled with this Red and White quilt.  We all loved it also.


Callie (with the help of her mom) shows off her cute cute DNP * Disappearing Nine Patch.
We are so excited the young girls are excited about sewing.


Jamie and Jackie display Jamie's DNP made with two "Giddy" charm packs and borders.


Aunt Sydney shows Chandler and Lynn's DNP out of "Giddy" Fabric also.
I think the Arnett Family bought out the Scrapbook store of "Giddy" fabric. Everyone loves it.


Heather brought this adorable skirt and headband daughter Jessica made.  We were so sorry Brooke didn't feel well and we hope she can come to our next BEE.


Aunt Sally made this skirt out of a "Jelly Roll " Fabric
for a Granddaughter,
 So Cute


Kim is excited about this strip quilt inspired by Tara's quilt made from a "Jelly Roll"
We helped her trim up the sides and she is now ready for borders.  


This is the group at the kitchen table and this is
not even half of the group.
Jacque
welcomed us into her home and we had lots of room for all of us.
Jamie, Kim,  Abby, and Julie, Calli and Paige.


Heather is pressing her blocks.
This is one of the things we talked about was pressing.
It is a must.  Press as you go.


Betsey and Aly are working on nine patches.  


Jackie, Annie and Brooke working on projects.


Joy, Peg, Sally and Sydney


Joy show this quilt she has finished made from "Layer Cakes" It is a stack and whack .  You put 5 fabric in a stack and  after cut you shuffle the stack so you have a mixture in each block .  So Great.  Made with "Recipe For Friendship" fabric


And This is Joy's DNP made with "Giddy" Fabric.  It is so amazing how each quilt turns out so different  when you use the same fabric with different borders.


Annie finished this all by herself.  It is so great.
  Annie is the one that saved her own money and bought her own sewing machine (a really nice one I might say).
Annie this is just a start! You Go Girl!

Fun Fun night. We are ready to see what the Utah and Cali group has to show.
 

Friday, January 14, 2011

How to bind your quilt

Aunt Glenna had a great idea to share tips on binding for when your quilt projects are in the "thank goodness I'm almost done" stage.
She recommended this one from Heather Bailey, and just this last week I finally finished a baby quilt for a nephew who's now 7 months old, and I used the Heather Bailey one and this one from JayBird Quilts to help me figure it out.
Hope this helps!

Sunday, January 9, 2011

Special Edition fabric swap!

(Just for fun, I added this picture I found on Amy Butler's website. I fell in love with that quilt! I'm excited to see all the gorgeous things that this group will make with our fabric swap charm squares!)


Okay, for the 30 of you that participated in the Amy Butler fabric swap (and thanks for being forgiving of my late notice about that...), here are the instructions:

We are calling this the Arnett Quilting Bee Reunion Quilt!

We'll each end up with over 70 charm squares (5" squares) to make something with. The only "rules" are that while we are free to add some favorite fabrics from our stash to the reunion quilt, we should try to keep our finished product around 75% made from the charm square pack that we'll receive. Is that clear as mud?

Basically, the fun is in seeing how different each of our quilts end up when we all started with almost identical groups of charm squares. Adding different fabrics to the quilt makes it unique to each of us and our own tastes, and that's fun! But adding too much makes it maybe a little too unique, and then we'll lose the commonality in all of our finished projects.

So feel free to make it your own, but for the fun of it, let's all play the game and make our very own reunion quilt! I went on flickr and searched "Amy Butler charm squares" and this is what I found. Check this out for some inspiration of what to do with your charm square pack. Also, don't forget the post on this blog showing cute projects made with charm squares. Most of the quilts have links to a tutorial on how to make it.

The most important part, of course, is to send me a picture of your finished quilt when you're done. We all want to see what you've made, and email you our "Oohs" and "Aahs".

And lastly, let's all give a big THANK YOU to the Sistahs (Donna, Glenna, Sally, and Peg) for cutting up all that fabric into charm squares. That was a big, tedious job, and we really appreciate your hard work in making this fun fabric swap happen.

Scrambled 9 Patch

Hi Everyone! Here are the instructions for the project that we started at the reunion. As you can see in this picture I stole from Aunt Glenna's fun quilting blog, this is the example we had at our quilt activity and this is a good reminder of how you'll get four blocks out of each chopped up 9 patch.

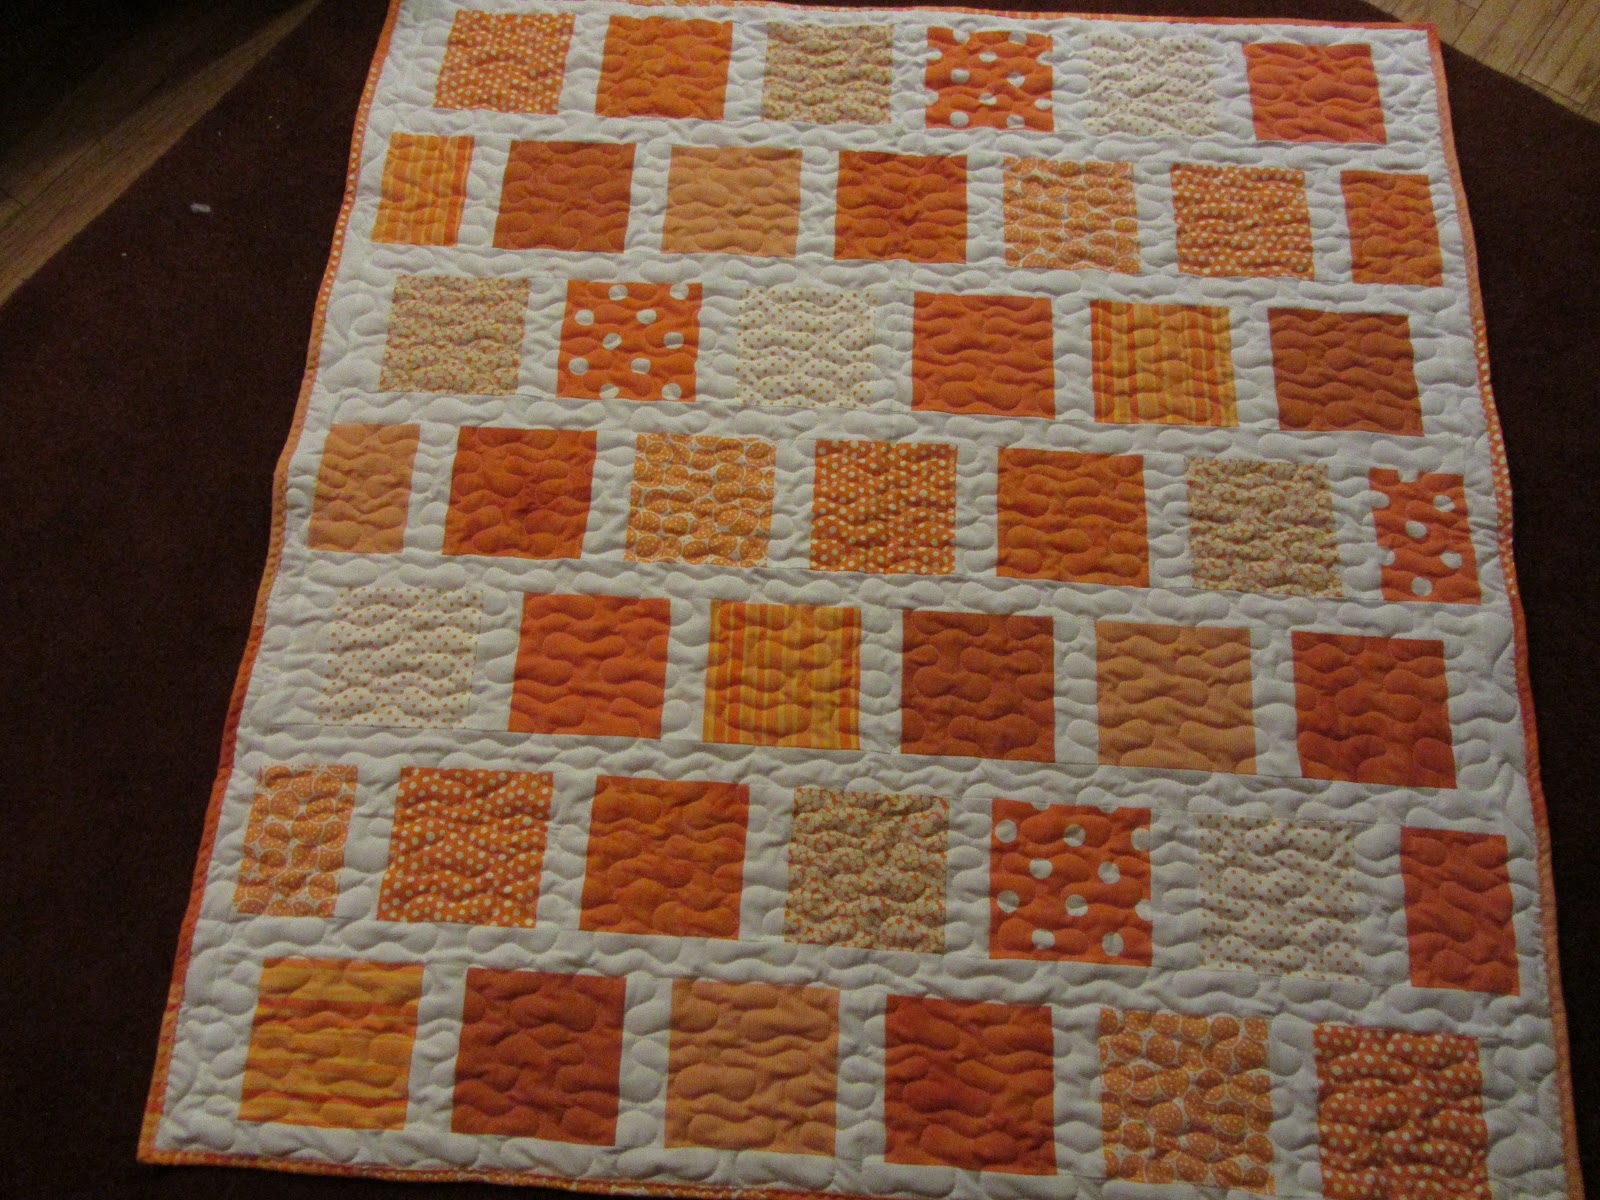
Once you have all four of your 9 patch groups sewn together and then cut into four blocks, you can sew your 16 blocks together however you want. Here's a photo group of different ways to put together your scrambled 9 patch blocks.

Don't forget! When you've finished your scrambled 9 patch project, email me a picture so I can put it on the blog! We all want to see it so we can say, "Way to go!"


Here are the instructions to help you finish your quilt:

SCRAMBLED 9 Patch

By Sally Traynor


Cutting instructions:

Do not cut the 5” charm pack

Inner border, cut 4 strips 1 inch wide x WOF

Outer border, cut 4 strips 3 inches wide x WOF

Binding, cut 4 strips 2 ½ inches wide x WOF

(WOF means "width of fabric")


Directions:

  • Take the pack of 5” charm squares and divide into 4 groups of nine. Lay out a nine patch from each one. Sew each nine patch together.

Press rows 1and 3 opposite of row 2.

  • With your rotary cutter, cut each 9 patch block right down the center in both directions.

See the new blocks emerging?

  • You will now have 16 blocks each about 7 inches. Lay out the new blocks, 4 rows of 4, rotating so that there will not be any intersections.
  • Sew the 4 blocks in each row together, press, then sew rows 1 -4 together, pressing each row.
  • Add the inner border, the 1 inch strips. Press
  • Add the outer border, the 3 inch strips. Press
  • Layer backing, batting and quilt top. Quilt and Bind.
  • Finished size is 32” x 32”